Introduction - This article explains how to create an Excel Macro file.
Software Required
Microsoft Excel.
Note - Here, I’m using Microsoft Excel Version 2013. But, it doesn’t mean we can create the macros using Microsoft Excel version 2013 only. Well, we can create it with other versions of MS Excel too.
I presume that everyone knows how to install Microsoft Office in your machine.
Open Microsoft Excel 2013.

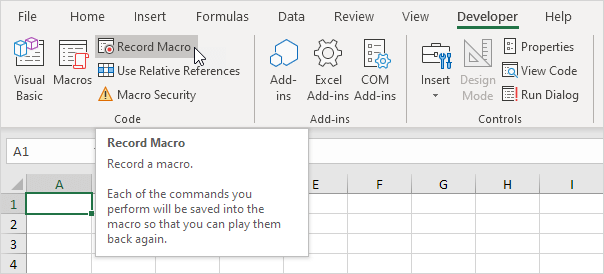
For Creating Macros, we use a tab named DEVELOPER in Excel.
I know, if you are trying to create the macros for the first time in your machine, you will not be able to easily find the DEVELOPER tab when you open Excel.
Don’t think that your MS Office is not installed properly. MS office is installed properly only but by default Excel will not provide Developer Tab in the menu bar because of the below reason.
People use Excel for many purposes. So, the Microsoft Team made only the common functionalities available to the user by default, like browsers. When we launch any browser, we will not be getting any developer options, but if you wish to use or see Developer options, then by just pressing the F12 key, you will be getting developer options. Similarly, if you want to utilize Developer Options which are available in Excel, you just need to modify a few settings in your Excel.
Follow the below steps to enable the Developer Tab in Excel.
Click on File menu tab and select Options tab from the below window.

After clicking on Options tab, you will get the below popup with Title as Excel Options. Click on Customize Ribbon which is available at the left side of the below popup.

Once you click on Customize Ribbon, you will get the below options. In the right side, you will have a Developer Checkbox, as shown in the below figure.

Check the Developer checkbox and click on OK.

Now, you can find the DEVELOPER Tab in your Menu Bar. Click on Macro Security option available under Developer Tab, as shown below.

You will get the below Dialog box opened. Now, select Macro Settings from the left side, check the fourth radio button (Enable all macros), and click OK.

That’s it!!! The modifications are done.
Now, let's create a basic Macro.
Click on Insert from Developer tab.

And from the popup, select Command button (which is highlighted) under ActiveX Controls.
Then, click on the Excel Sheet area (where we write the data). Now a button is created in your Excel Sheet, as shown in the below image.

To change the properties of this button, right click on the button and select View Properties from the menu. A properties window will be opened for you.

In the above image, you can see the list of properties available for a button control.
Below are the few properties we use mainly for Button Control.
- Name - this will be used as an identifier for this button while writing the VBA code.
- BackColor- used for changing the background color of the button.
- BackStyle- here we have two options to choose one is Opaque which is displayed by default and the second one is transparent which is used for making the button background as transparent.
- Caption- used for displaying the text in UI.
- Font- used for changing the style of Display Text in Button.
- ForeColor- used for Changing the Display Text Color.
Now, change the name and the caption of the Button.

Close the properties window and double click on Button. You will get Microsoft Visual Basic for applications design window. In this, you can find a small window for writing the code, as shown below.

Write the following code.

MsgBox is used for displaying something in the popup. Here, I’m displaying the message “Hello”. Now, save the workbook.
Note - While saving the Workbook, select the Save as an option and change the "Save as type" to "Excel Macro-Enabled Workbook".

Now, close the design window and come back to Workbook. If the Design tab which is available in DEVELOPER Tab is selected, then click on design mode once again, to de-select it.

Now, click on the "Say Hello" button. You will get the below popup displaying Hello!!

I have attached the source file here with this article.
I hope you find this article useful. Please provide your valuable feedback, questions, or comments about this article.


%20in%20Java.png)


